Here’s to @baconandbaileys Happy Blogiversary


One of the things that I enjoy about blogging is the sense of community that exists among bloggers and twitter friends.  The honest exchange of ideas, passions and talents has a great appeal.  I have really enjoyed the flood of ideas, creative inspiration and humor that comes across my twitter timelines and is amplified in the blogs of my online friends.

Kelly Neil,@baconandbaileys on twitter, and creator of http://www.kellyneil.com has contributed amazing photography and shared her passion for food and enjoyment of life with us for a year now.  In celebration of that I created a dessert in honor of her contributions.

Renee Lavallee, @FeistyChef on twitter, and author of a Tuesday column in the Arts & Life section of the Chronicle Herald shared her pizza dough recipe with us last Tuesday.    After reading the article honouring pizza and discovering a simple recipe that promised to deliver and amazing crust I just had to it it out.  Renee invited me to try using this dough with some local meats and cheese.  I did just that and the crust, as promised, was fantastic, I will blog the results in a day or so.  First I want to share the results of my @baconandbaileys and @FeistyChef inspired dessert.  The pizza dough recipe I used for the base is provided in the following Chronicle Herald column. http://thechronicleherald.ca/ArtsLife/1235545.html .  If you like this pizza dough recipe check out Renne’s blog http://feistychef.ca/ .

This Bacon and Baileys pizza has 3 components, the crust, the cheesecake inspired ‘sauce’ and the toppings.

Toppings:

3 Strips of thin sliced Smoked Bacon

2 Tbsp Maple Sugar

1 Cup of Water

1 Cup of Sugar

3/4 Cup of Whole Pecans

2 tbsp Milk Chocolate chips or wafers, very cold

Preheat the oven to 400 degrees.  Place the bacon on a cooling rack over a foil lined cookie sheet Place in the oven for 5 minutes.  Remove from the oven and sprinkle half the sugar on the bacon.  Return to the oven until the sugar has melted.  Remove for the oven and flip the bacon.  Sprinkle the rest of the sugar on the bacon.  Cook until the sugar is melted and the bacon is cooked.  Watch it carefully bacon burns fast.

While the bacon is cooking combine the sugar and water in a sauce pot, attach a candy thermometer.  Bring the water to a boil over medium high heat, and heat until the temperature reaches 310 degrees and the color turns golden.  This will take a while but watch it carefully, once it gets to around 300 degrees the temperature will spike fast.  While the water is boiling spread a layer of nuts on a silicon mat on a cookie sheet.  When the syrup has reached temperature and color pour it evenly over the nuts.  Allow them to cool completely.  They will look cool before they are, be very careful, nothing you cook with can burn you like hot sugar.

Put half the brittle into a food processor and chop till it is the size of fine gravel.  Rough chop the candied bacon.

In a spice grinder or coffee grinder grind the cold chocolate chips into course sand

Baileys Pizza “Sauce”

Ingredients

1/4 cup of Ricotta Cheese (Prior Recipe)

2 Tbsp Quark or Creamed Cheese

1 Tbsp Baileys

2 tsp Vanilla

1 tsp Maple Sugar

1 Egg Yolk

Combine all of the ingredients except the yolk. Taste and adjust to your personal taste, the alcohol flavor will cook off.

Crust

I made the crust according to Renee’s directions, but halved the salt.  I preheated my oven to 525 degrees with the stone in the oven.  I rolled out the dough to 12 inches and very thin.  Then I put fork holes all over the skin to help reduce it puffing up.  I baked the skin for 4 minutes then removed it.

A couple tips for baking pizza.

  • Make sure your pizza stone is hot when you put the skin on it.  It helps crisp the skin.
  • Use a pizza peal to transfer the pizza to the stone and pick it up.  Put a bit of corn meal on the peal to allow the pizza to side easily

Assembly

Ingredients

1 tbsp melted butter

2 tsp maple sugar

Take the pizza skin and spread a thick layer of the Baileys pizza sauce on it.  Then sprinkle on the crushed candied brittle, chocolate, and chopped candied bacon.  Break the remaining candied pecans and lay them on the pizza.  Brush the edges of the pizza with melted butter and sprinkle with sugar.  Slide the skin back on the hot pizza stone and bake until the crust starts to brown and the topping is bubbly, about 5 minutes.  Allow the pizza to cool and serve with a shot of Baileys.

Thanks to my local providers:

Bacon : Sweet Williams Country Sausage

Maple Sugar: Neil R Ripply Maple

Milk and Quark : Fox Hill Cheese House

Creative Local Lunch in 10 Minutes – Yum!!


Sometimes you just need a quick bite to eat and you dont want to make a fuss.  These are the times when we can slip into eating high salt, high fat poor quality processed foods.  My secret in combating this is to not have it in my house.  Does that mean I am stuck taking a lot of time and effort to make a quick meal?  Of course not.  People have been making quick delicious meals at home long before Kraft or Campbell’s came into being and they will be doing so long after our addiction to this stuff has passed.

I wanted a quick lunch yesterday and I looked to my refrigerator.  I make it a habit to have some boiled potatoes around when ever possible.  I had thawed a half a pound of grass fed ground beef and decided a burger would be nice.  When you have amazing beef all you need is a little salt and pepper in the burger to bring out the natural flavors.  I added about 1/4 tsp of salt and a few turns of pepper.

I had some rolls I made the day before and so I made the patty in the shape of those rolls and heated up a fry pan.  I took one of the potatoes I had in the fridge and cut it into steak fry pieces, added a little oil to another pan on medium high heat and added in some spices (garam masala, chili powder and garlic).  You can use what ever you have on hand that tastes good.  I put the potatoes into the hot oil, and the patty into the hot no stick pan.  I flipped them when required and focused on the rest of my meal.

While those were cooking I toasted off a bun and then pulled out a jar of Sesame Ginger Sauce for littlered kitsch’n.  Now if your are a regular at the Halifax Market you have probably met Jenna, the owner of this wonderful little business.  She make ready to eat meals, amazing desserts and sauces for your convenience.  If you need a quick meal I would defiantly talk to Jenna.  She uses local ingredients and her food is honest and delicious.  I keep a jar of her sauce around for times like this when I don’t want to make my own.  It is really very good.  I also had some pickled sweet carrots from Shani’s Farm on hand to round out my lunch.

Finally I decided some cheese was required and had a little Fox Hill Cheese Fenugreek cheese on hand.  I melted under the broiler and my lunch was finished.  It was all local, very flavorful and was ready in ten minutes.  One you get used to it you wont want to trade this for a bowl of instant microwave food or a burger from a fast food joint.  There is really no going back.


As Always Thanks to my Local Providers :

Sesame Ginger Sauce : littlered kitsch’n

Ground Beef:                    Getaway Farm

Pickled Carrots:               Shani’s Farm

Potatoes:                           Noggins Corner Farm Market

Mexican Inspired Fritatta Made with Emu Egg, Delish!


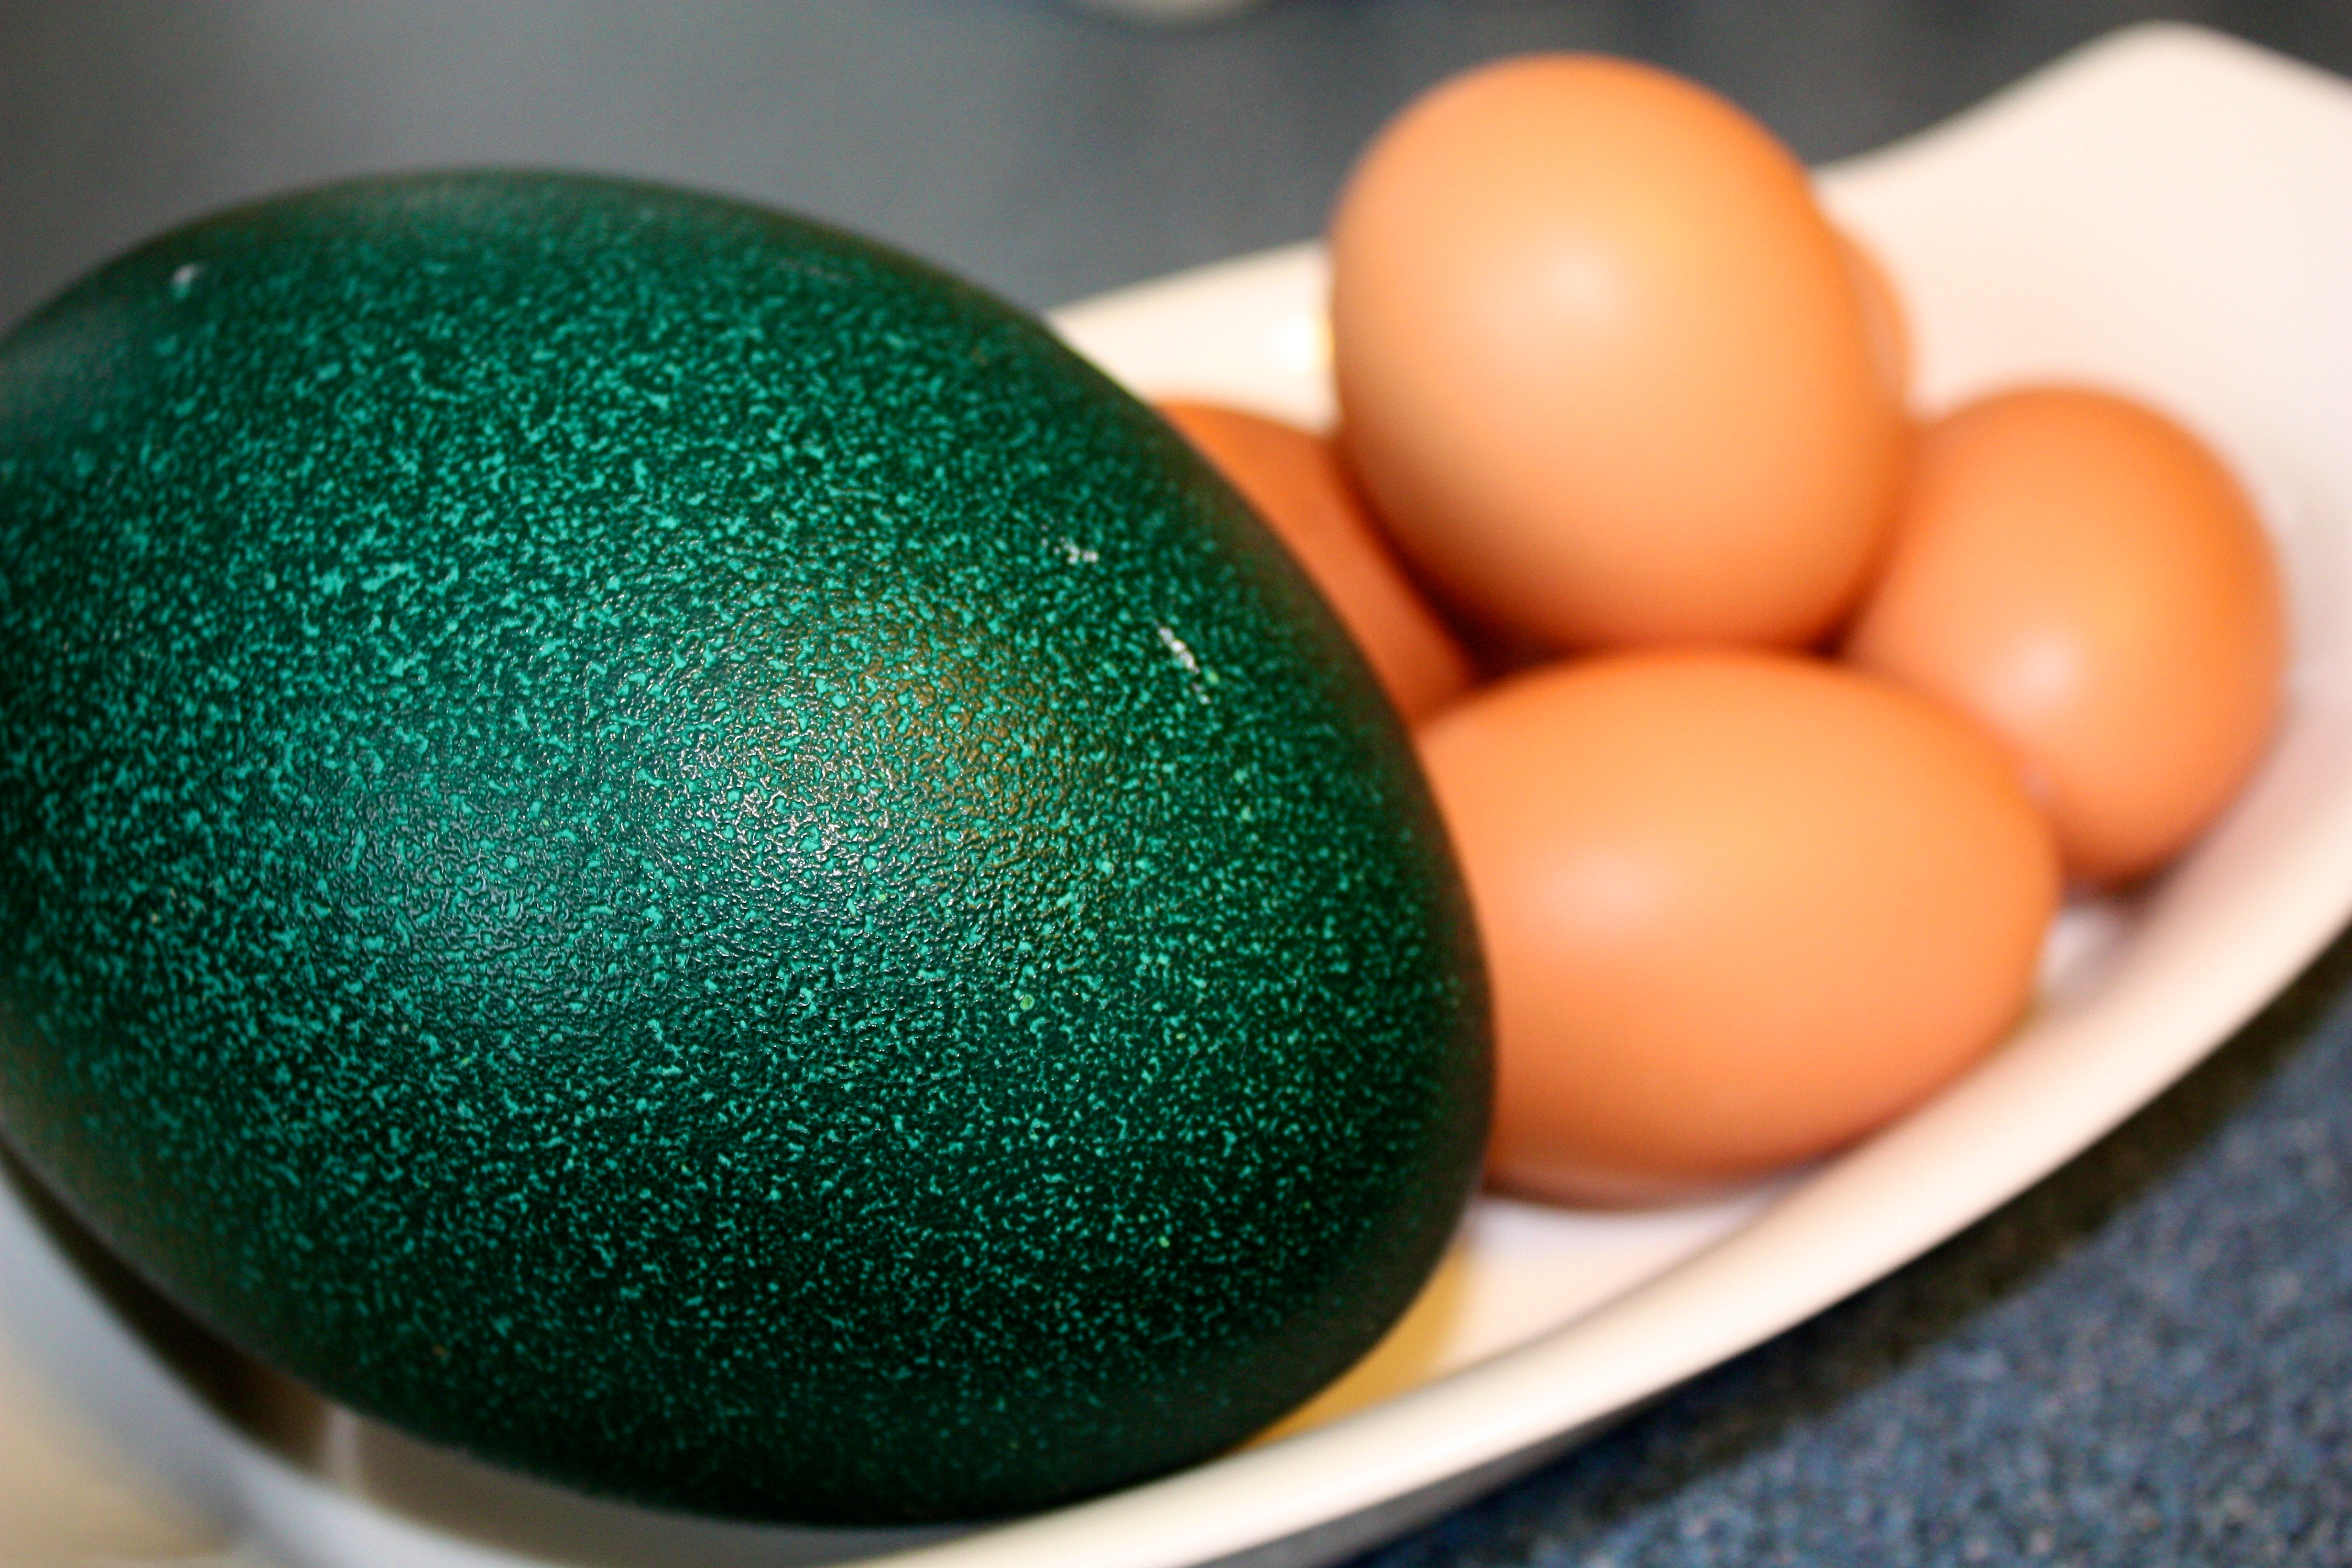
I was wandering through the Halifax Market the other day and saw the coolest thing I have seen in a long time.  I reached out, grabbed it, paid for it and then looked in my hand and said, what am I going to cook with an emu egg.  Yep thats what it is like to be me.

I did some reading and found out that the flavor is a lot like chicken egg, maybe a little less flavorful.  The whites don’t set as fast and from a health standpoint they are free range and very nutritious.  One emu egg is equivalent to about 10 to 12 chicken eggs so  what ever I made had to be a larger dish.

Taking all of this information I decided I wanted to make a really flavorful fritatta.  Mexican flavors.  That called for some homemade chorizo sausage, fresh cheese curd and savory cilantro.  Here is how it all came together:

Ingredients:

1 Emu Eggs (10 to 12 chicken eggs)

1 Onion chopped

3/4 of a pound of Homemade Chorizo

1/2 cup Fresh Cheese Curds

1/2 handful fresh Cilantro – chopped

1/4 tsp salt

1/2 tsp black pepper – fresh ground

1/2 tsp paprika

2 medium potatoes boiled (until just fork tender) and chopped (1 cm dice)

2 tbs grape seed oil

Preheat the oven to 325 degrees

Heat an oven proof pan over medium high heat, add in 1 tsp of grapeseed oil when the

oil is hot add in the chorizo sausage and cook until it starts to brown, remove and drain on a paper towel.  Add in the potatoes and a pinch of salt and a couple turns of pepper into the pan (in the oil left by the chorizo) and fry them off until they start to brown and get crispy, then add back in the chorizo, and then onions, if need add another tsp of oil.  Cook unit the onions start to soften and get some color.  While this is cooking:

Crack your emu egg (or chicken eggs) into a large bowl and whisk until frothy,  Add in the chopped cilantro, 1/4 tsp of salt. 1/2 tsp pepper and 1/2 tsp of paprika.  Whisk until combined.  Add this directly into the pan with the potatoes, chorizo and onions.  Remove from the heat and top with the fresh cheese curds.

Place in the oven and cook for about 10 minutes.  At this point the eggs should have set, if not check it every couple minutes.  It should be firm to the touch but a little runny on top.  When it reaches this stage, turn on the broiler for about 3 minutes until the top firms up and starts to get a little golden color.  You want to watch the progress of the dish and not depend on time.  Eggs should not be over cooked, you don’t want rubbery, hard brown eggs, and that can happen very quickly.  This dish builds flavours in each component and to provide an overall flavorful dish.  Each component is seasoned and this is very important in a fritatta or you can end up with some parts that are very flavorful and other parts that are bland.  I enjoyed this and hope you do as well.

Thanks to my local suppliers for making this breakfast possible:

Emu Egg :                      The Dutchman Cheese

Fresh Cheese Curd:     Fox Hill Cheese House

Onions/Potatoes :     Noggins Corner Farm Market

Cilantro:                        Riverview Herbs

Homemade Chorizo Sausage – A Mexican Treat


I have a few recipes I want to share with you that use chorizo sausage.  Fresh chorizo is a key ingredient in mexican and south western American cooking.   It adds great richness and flavour to dishes and I really enjoy it.  As with all ground meat products I prefer to know what I am eating.  For this reason I make most of my sausage meat at home, though there are a couple providers a the Halifax Market I trust and am hoping to visit to watch them in action.

I have already put up recipes for making homemade breakfast sausage and italian sausage.  Chorizo is just another variation of that.  The base is a good ground pork and then add some amazing seasoning and allow to sit over night.

Ingredients:

1.5 pounds of ground pork (Berkshire pork of you can get it)

1 Tbsp Paprika

1 tsp sea salt

2 cloves of chopped fresh garlic

1 tsp cayenne pepper (increase or decrease based on your desire for heat)

1 tsp cumin (toast the seeds in a dry pan then grind for best results)

1 tsp oregano

1 tsp mexican chili powder

1/4 tsp cinnamon

1.5 Tbsp White Wine

In a large bowl spread out the pork as thin as possible.  Sprinkle half the spices over the pork, mix well.  Spread out again and repeat.  Mix well.  Add in the white wine and stir.  Cover and refrigerate for a couple hours, overnight is best.

This fresh sausage can be use in any recipe calling for chorizo.

Special Thanks to my local supplier Active Life Farm for providing me with amazing Berkshire pork and fantastic local garlic.  They made this Chorizo special.

Corned Beef, An Flavour Treat using Local Beef


Salt meat has been around for centuries, it has been a very long standing traditional method of preserving meat.  Corned Beef is actually salt beef, the corn comes from the type of salt (corning salt) used to cure the beef.  What we call corn actually got the name because the kernels are the size of the salt used to corn beef.  No wonder I couldn’t find the corn it when I was a kid.  I looked pretty hard.

So with freezing, refrigeration and other modern preservation methods why would we salt beef.  Taste of course.  As the salt is drawn into the beef it also draws in water and any favours dissolved in it.  This means that using the corning method we can infuse beef with moisture and well as flavor.  Commercial corned beefs are loaded with nitrates which are needed to preserve the meat.  When made at home you can leave this out, you wont get the pink color but you will get all of the taste and it wont last long enough to go bad.  Canned corned beef… yeah well we wont go there.  I will not criticize the use of nitrates, if we want commercial cured meats this is needed, but find someone who uses it in moderation.  However mystery meat in a can, yeah lets not.

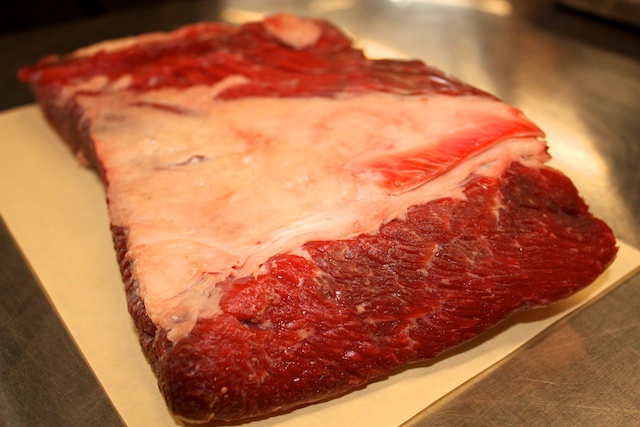
Corned beef is made from brisket.  Brisket a cut from between the front legs, in the chest area of the cow.  It support more than half the weight of a moving cow so the amount of connective tissue requires it to be cooked in a very specific manner to keep it tender.  It needs to be cooked low and slow and if possible in a moist environment.  Another method of cooking brisket is smoking it for hours at a low temperature.(which I will leave to my good friends at Boneheads BBQ until I can get a smoker).

I got my beef for this recipe from Getaway Farms in the Annapolis Valley.  They are a great local option for grass fed beef.  Their beef are free range in the summer and they take special care in how they preserve the grass to feed them in the winter.  They are so proud of how they treat and feed their animals they even had a bag of the grass they feed there cows at the market for me to smell.  It was like spring in the middle of winter.  This beef is more lean, and much better for you than grain fed factory beef, and the flavor is amazing.  It made great corned beef.

When choosing your beef you want it to be sure it is fresh, deep red and you want the fat cap trimmed back.  You want a good amount of lean surface area, don’t trim all the fat but much of it.  If the beef is previously frozen or really oxidized (brown) I would not try to use it for this.  Too much risk of existing bacteria.  You want fresh beef.

Here is how I make my Corned Beef:

You will need:

One Piece of Beef Brisket (3 – 4 pounds)

Dry Rub

3 Cloves

5 pepper corns

2 tsp coriander

1 tsp mustard seed

1 allspice berry

Take the above ingredients and dry toast them in a skillet until they warmed, do not burn them.  Place them in a spice grinder with:

6 red pepper corns

1/2 tsp dried red chillies

1/2 tsp cinnamon

1/4 tsp thyme

1/2 tsp sage.

Grind until all spices are broken up and then spread evenly over the entire brisket.  Wrap in cling wrap and place in the refrigerator for 4 hours.

Once the beef is in the refrigerator you need to make the brine.

In a large dutch oven combine:

20 cups of water

2 cups course salt

1/2 cup of brown sugar

1 tsp mustard seed

1 tsp black peppercorns

10 whole cloves

10 juniper berries

2 sticks of cinnamon broken in half

1/2 tsp mace

1 tsp red pepper

1 tsp ginger

2 tbsp corriander

1 bulb of garlic cut in half

Bring the mixture to a boil and stir to dissolve all the salt.  Then allow the mixture to cool to the point where you can put it into the refrigerator.  Do not put the meat into this mixture until it is cold.  You do not want the beef stewing in warm water, this is really not safe and could cause food-born illness.

When the mixture is cold and the beef has rested with the dry rub for 4 hours place the beef into the brine.  The brine needs to cover the beef.  If it down not put a couple bowls on top of it to weigh it down.

Let the beef sit in your refrigerator for 7 to 10 days.  No it will not go bad, that is what the salt is for.  I will however absorb all of that amazing spice and flavor making the best corned beef you have ever had.

After the 10 days remove the meat from the brine and discard the brine.  Rinse the beef under cold water to clean off the excess salt.  Now put the beef in your dutch oven with the following:

3 carrots rough chopped

3 stocks of celery rough chopped

1 Onion pealed and rough chopped

1 bottle of beer (I used Garrison Jalapeno Beer.. amazing)

4 or 5 sprigs fresh thyme

Water to cover the corned beef by an inch.

Heat 1 tbsp of grape seed oil in a pan, sear off the brisket on all sides.  Then add the rest of the ingredients.

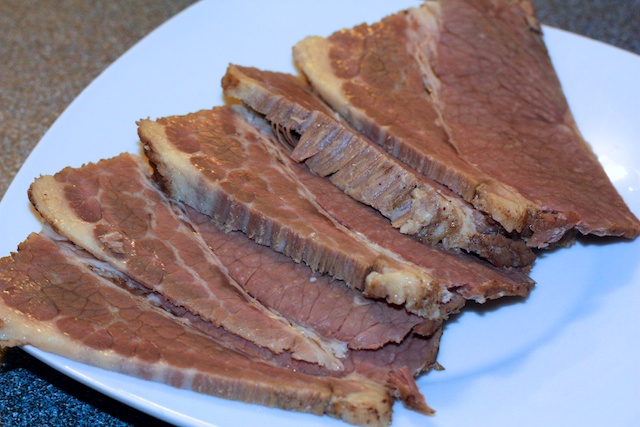
Bring to a boil then simmer over low heat for 2.5 to 3 hours or until fork tender. Remove from the water and let cool.  Then you can slice it across the grain for sandwiches, cut it into chunks for hash or use it in any of your favorite corned beef recipes.  I really enjoyed this one.

Thanks again to my local providers:

Brisket: Getaway Farms

Garlic: Active Life Farms

Herbs: Riverview Herbs

Beer: Garrison Brewery

Caramelized Apple Cake with Quark Frosting


Every now and again I ask my readers via Twitter to challenge me with a recipe that they would like to see done.  I find it interesting to see what my fellow foodies desire to eat and then challenge myself to cook it using primarily local ingredients in a creative manner.

Amy works at Fox Hill Cheese house and she said she wanted to create a birthday cake for her to bake this weekend using Fox Hill’s Quark and Yogurt.  I had to make it seasonal and add some flare so I decided to use the Quark (a less rich cream cheese/ricotta like product very popular in Europe) to make a filling for between the layers and flavor it will an apple caramel sauce.  The yogurt will add richness and moisture to the cake and I have used cinnamon to tie all of the flavors together.

I was going for a balance of flavour, a cake that has a nice balance of sweet, spice and sour.  I love the sour flavor from creamed cheese and quark has the same taste.  I also like the crunch and sour provided by the apple.  The cinnamon in each element provided a nice bridge.  I hope you enjoy as well.


Step 1 – Almond Brittle

I like a little crunch in a cake to break up the soft texture of the frosting, filling and cake.  For this recipe I made an almond brittle then ground it up in a food processor and then used the crushed brittle in the caramel, filling and to dust the sides of the cake.

Ingredients:

1 cup almonds

1 cup sugar

1 cup water

Lay the almonds on silicon mat or piece of parchment paper in a baking sheet in a single layer close together.  Combine the sugar and water in a pan and bring to a boil over high heat.  Then turn it down and boil until it reached 295 degrees on a candy thermometer.  Be very careful with this mixture it is very hot and can burn severely.  Pour the hot syrup over the almonds to cover them and let them sit until they harden and are cool.  Be very careful it will look cool before it is.  When it is cooled break it up and crush it in a food processor.  Set aside to use later.

Step 2 – Sheet Cake with Fox Hill Yogurt

Ingredients:

3 cups of flour

2 tsp baking powder

1 tsp baking soda

1/2 tsp salt

1 Tbsp Cinnamon

1 cup unsalted butter (room temperature)

2 cups of sugar

1 tbsp vanilla

3 large eggs (room temperature)

2 cups of plain yogurt (room temperature)

Preheat your oven to 350 degrees

Prepare a 17 x 11 x 1 inch sheet cake by greasing and flouring the bottom and all sides.  After you grease it just dust it with flour and shake off the excess.

Sift together your dry ingredients into a large bowl and set aside.

In a separate large bowl (I use a KitchenAid Mixer) add in the sugar, butter and vanilla.  Beat this on high for 3 to 5 minutes until light and fluffy.  This is a critical step to getting a light cake.  The sugar builds little tunnels of air to the butter adding fluffiness.  You will want to scrape down the sides of the bowl two or three times during this process.  You want to do the serious beating before you add your dry ingredients.  If you beat it after you add the flour you will build gluten and end up with a tough dry cake that has those tunnels through it.  You don’t want any part of that.

Now that you have fluffy butter and sugar you want to add the eggs.  Break the eggs into a small bowl.  You always do this, if you add them directly into the butter and sugar and you lose a piece of shell it is a bugger to get it out of the batter.  Add the eggs in one at a time until each egg is incorporated.

Now we will add the flour and yogurt.  This is the point where we want to keep the mixing to a minimum.  With the mixer on low add in 1/3 of the dry ingredients stir until incorporate.  Then add half the yogurt and scrape the bowl and mix in.  Add the next third of the dry and then the rest of the yogurt and ending with the dry stirring and scraping after each step.

Pour the batter into the prepared sheet pan and bake at 350 for 20 to 30 minutes.  It should start to brown a little and a toothpick inserted should come out clean.

Allow the cake to cool for 15 minutes then invert it onto the bottom of another sheet try and cool for at least an hour more.  It needs to be totally cool before your assemble the cake.

While the cake bakes and cools you can complete the rest of the parts.  Note: I used half of this cake for the birthday cake.  The other half will be cut up and frozen for trifle at another time.  I got 10 slices an inch thick and as large as my hand.  If you want more cake use the whole sheet cake and double the following steps. (you will have enough brittle)

Step 3 – Apple Cider Caramel Sauce.

Ingredients:

2 cups apple cider

1/2 cinnamon stick

1/2 vanilla bean (2 tsp vanilla)

1/4 cup of brown sugar

2 Tbsp Butter

Put the cider in a small pot, add in the cinnamon stick and vanilla

and boil till it is reduced by half.  Add in the sugar and butter and return to the boil and cook until starts to thicken so that it coats the back of a spoon.  About 5 min.  Allow to cool to room temperature.

Step 4 – Fox Hill Quark Filling and Frosting

2 Cups of Fox Hill Quark (you could use half and half ricotta and creamed cheese)

5 Tbsp of The cooled caramel sauce

Whip the quark until it is light and fluffy, add in the caramel and beat until incorporated.  Oh yum!!!  (I have used quark on bagels before but it is the most amazing ingredient for frostings and fillings.)  I will be playing with this food!!!

Step 5 – Caramelized Apples

5 small macintosh apples pealed and sliced into wedges

2 tbsp butter

1 tbsp brown sugar

1 tsp cinnamon

Melt the butter in a frying pan and add in the brown sugar, stir.  Add the apples and sprinkle the cinnamon.  Cook until the apples soften (there should be a little crunch left).  Allow them to cool.

Assembly:

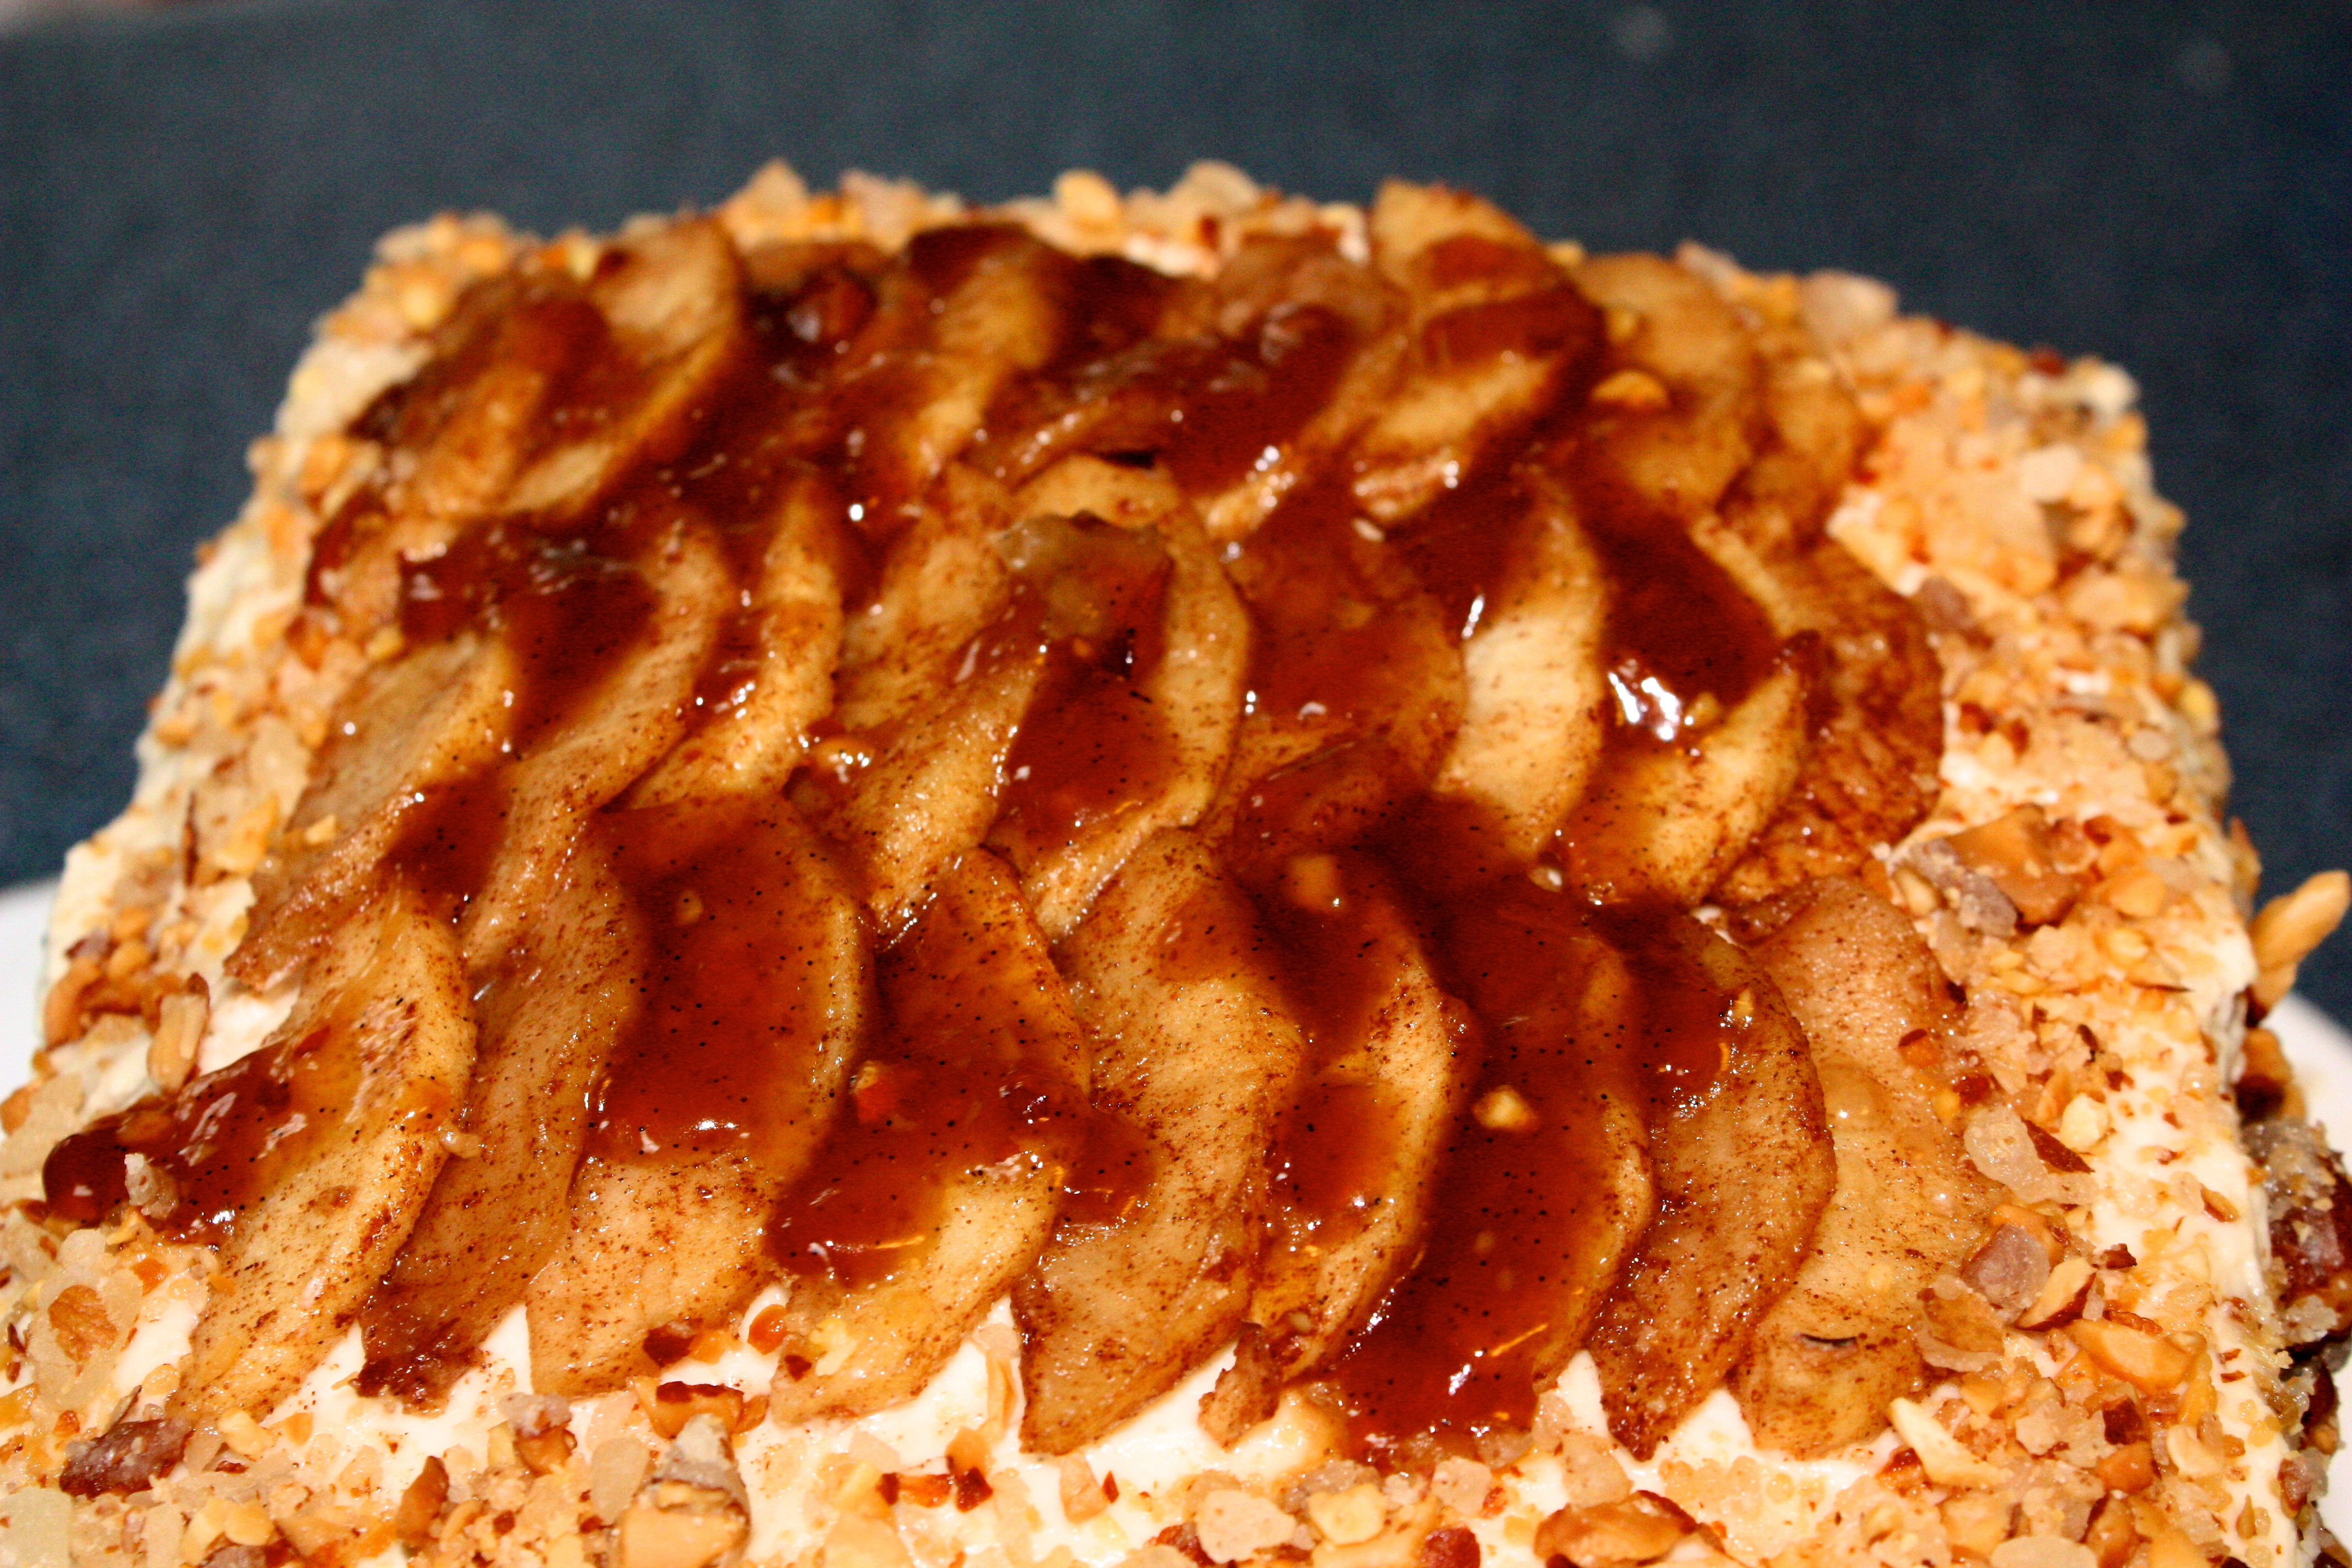
Cut the cake into 3 equal pieces widthwise and then in half lengthwise.  If you are using the whole cake do not do the lengthwise cut.  Take one of the pieces on the bottom of your cake plate and top with quark filling, dust with the almond brittle and then a single layer of apples.  Put the next cake section on top and repeat.  Top with the last section of cake.  Apply a layer of frosting on the top.  Layer the apples on top overlapping them leaving a 3/4 of an inch around the edges.  Frost the sides of the cake.  Then apply a layer of the crushed brittle around the empty edges on the top of the cake and then press on the sides. Drizzle the top with caramel sauce.

If you have any left over brittle it would be a great ice cream topping, and left over quark could be used on toast or a bagel.


As always thanks to my local suppliers:

Yogurt and Quark: Fox Hill Cheese House

Apples: Noggins Corner Farm Market

Apple Cider: Suprima Farm

Cinnamon: JamesLea

Eggs: Elmridge Farm